⌬ NO SIGNAL ⌬
Species Reference
◈▓⌬※▒
Reference traits
▒░▓ · ░▓▒ · ▓▒░
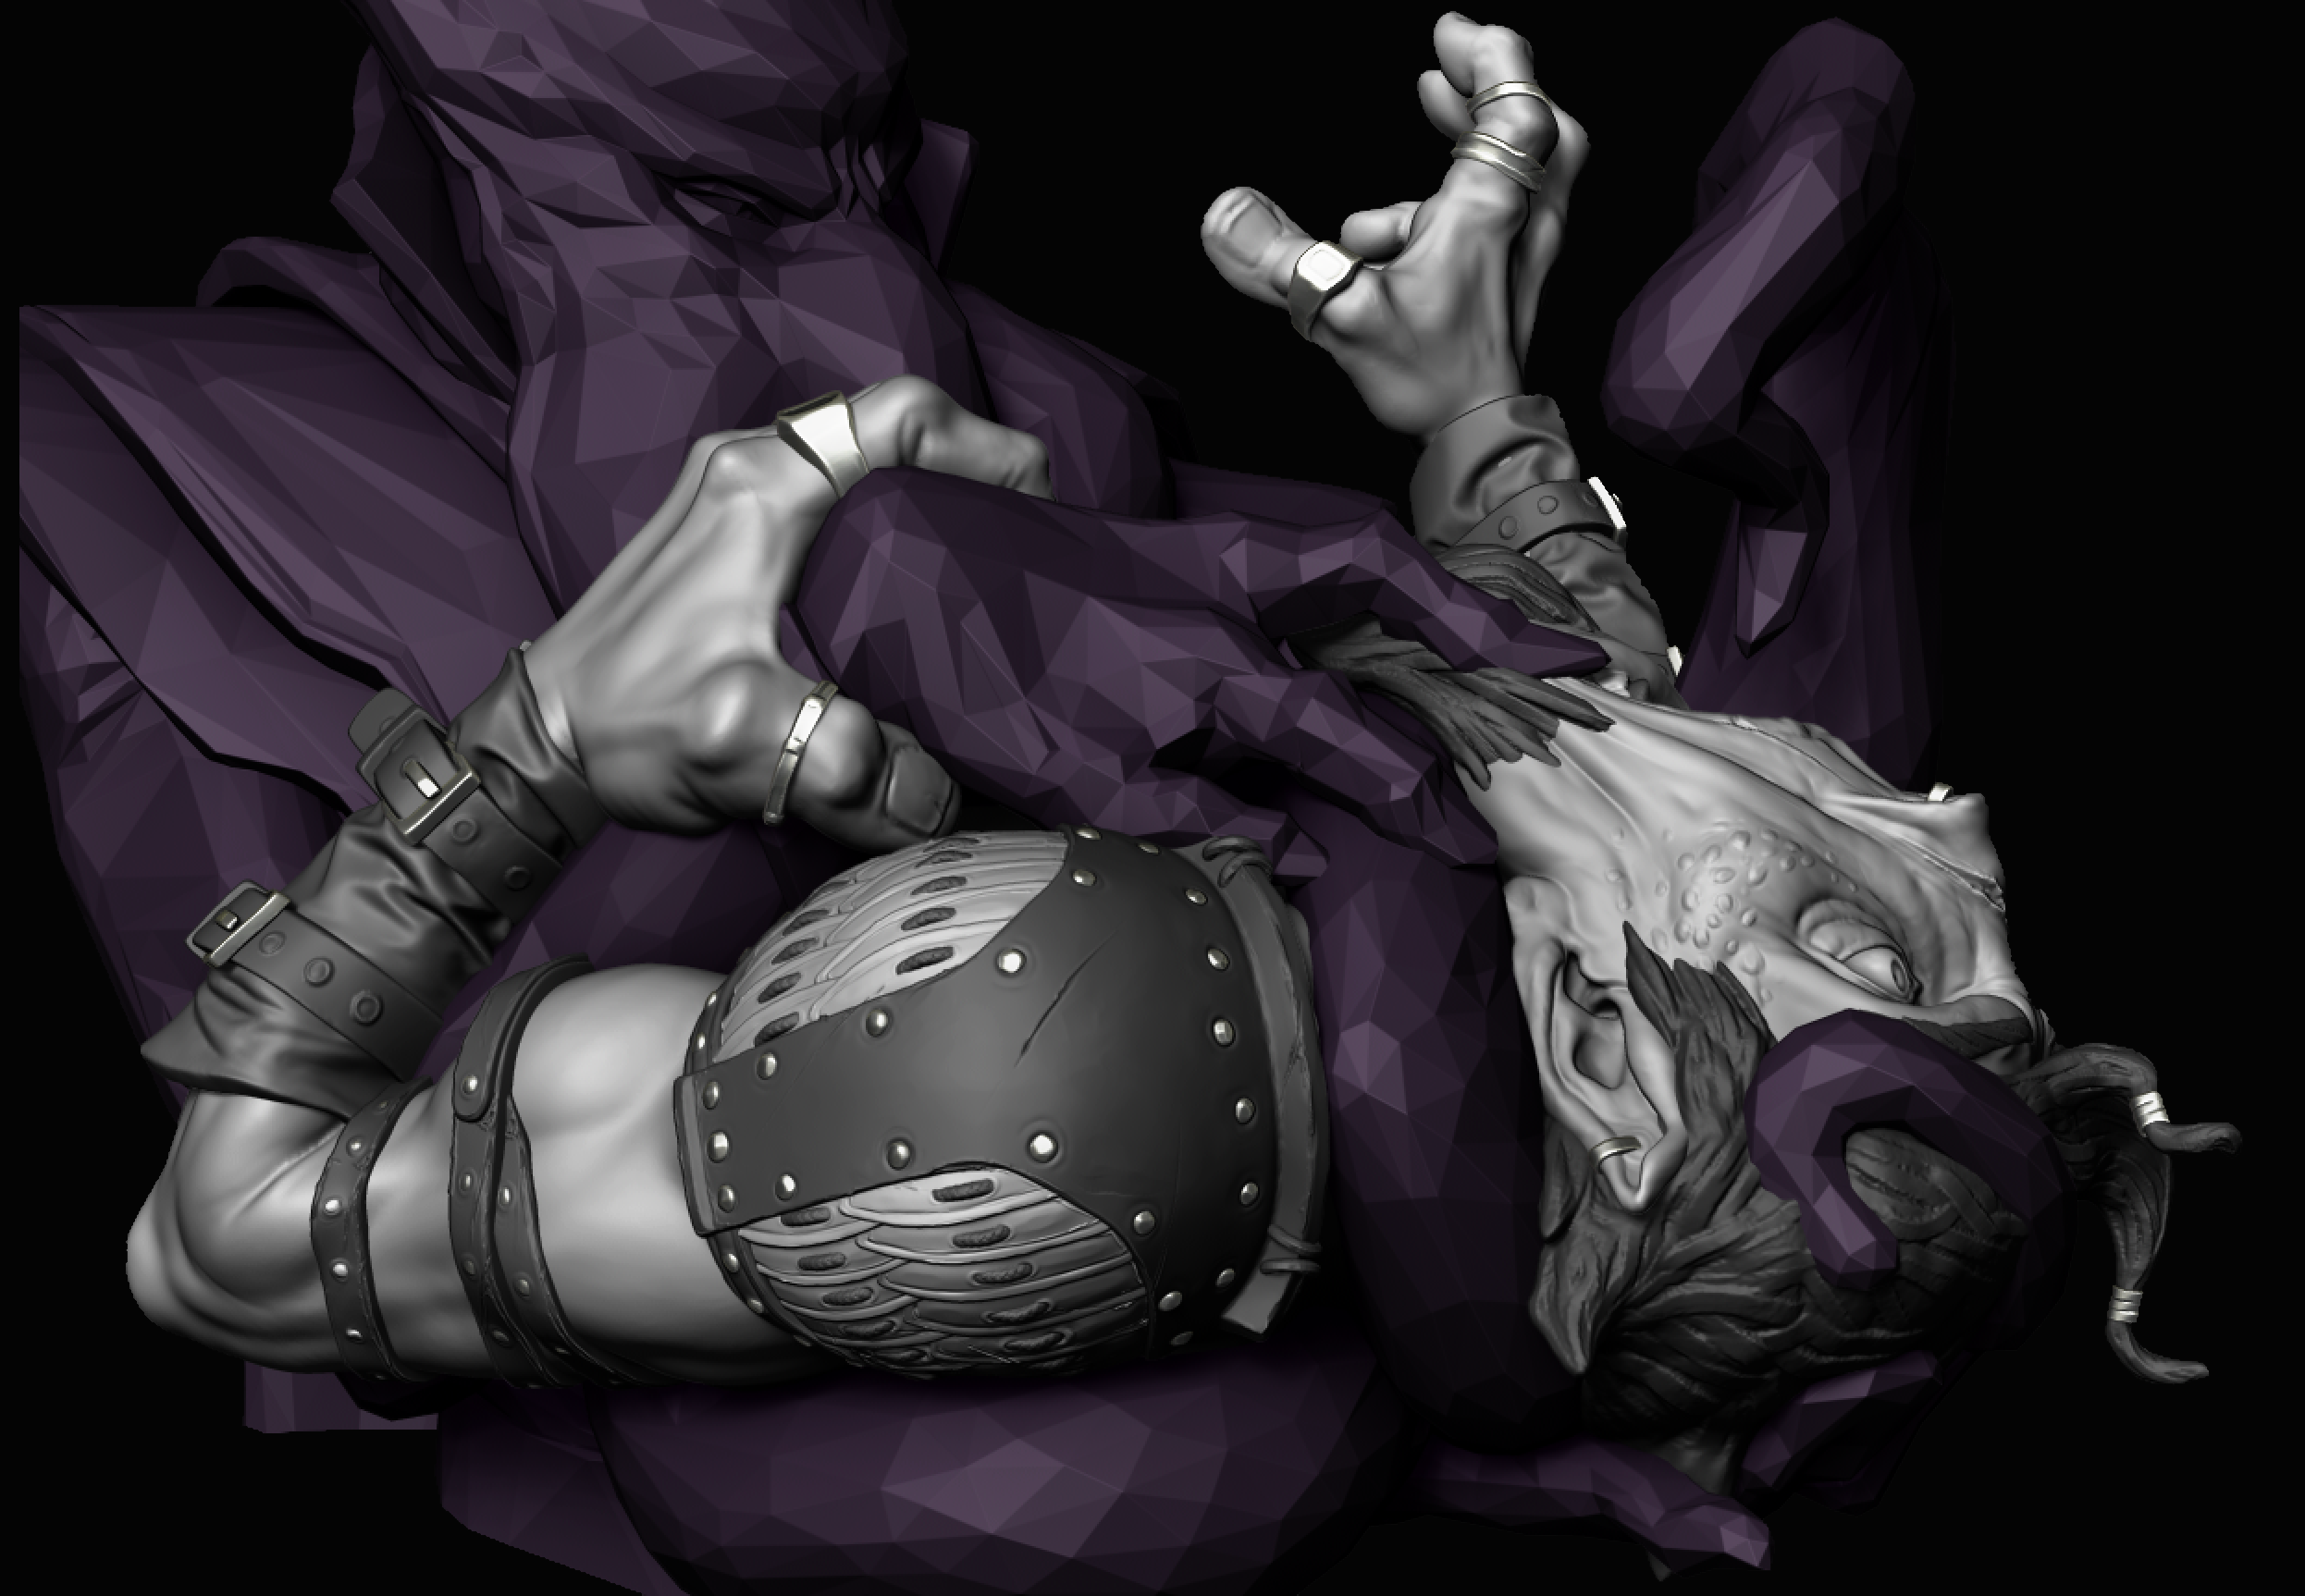
Teaching has become one of the most meaningful parts of my career. This section serves as a companion resource for the courses I teach, providing students with supplemental lectures, notes, demonstrations, project breakdowns, and reference material used throughout the semester. While these pages do not replace the courses themselves, they offer additional context and resources that students can revisit as they develop their skills and continue growing as artists.
Educational content is offline while this section is updated for ADA accessibility compliance. Check back soon!
This is an introductory digital sculpting course built around ZBrush. The class has changed quite a bit over the years as we've continued refining what students actually need early in the program. This is the current iteration for Fall 2026. The material collected here reflects the lectures, exercises, and resources I use to support the course, but it is not the course in its entirety. A large part of the class happens through demonstrations, studio work, critique, and the conversations that happen around the work as students develop it.
Required: Graphic Tablet and Hard-drive or USB/C Storage Device
Audience: This is a Freshman level course required of ANGD BFA majors.
No project content matches this search.
This sophomore-level lecture course builds a practical understanding of human anatomy for 3D artists and animators. The course focuses on the bones, muscles, proportions, landmarks, and other structures that influence the visible form of the body, commonly referred to as superficial anatomy. Students learn how anatomy relates to form, function, movement, and articulation, then apply that knowledge within their own disciplines through sculpture, modeling, rigging, and animation.
Required: Graphic Tablet and Hard-drive or USB/C Storage Device
Audience: This is a Sophomore level course required of ANGD BFA majors.
No project content matches this search.
This progressive studio course sequence develops the skills required to create production-ready 3D environments for both real-time and offline workflows. Students explore modular workflows, hard-surface and organic asset creation, materials, lighting, composition, optimization, world-building, and engine integration while producing increasingly complex environments for games and cinematic applications.
Required: Graphic Tablet and Hard-drive or USB/C Storage Device
Audience: This is a Sophomore–Junior level course required of ANGD BFA majors.
No project content matches this search.
This progressive studio course sequence focuses on the creation of production-ready 3D characters for both real-time and offline workflows. Students develop skills in anatomy, sculpting, topology, clothing, materials, grooming, optimization, and rigging while advancing from foundational character principles to fully realized, industry-centric character art.
Required: Graphic Tablet and Hard-drive or USB/C Storage Device
Audience: This is a Sophomore–Junior level course required of ANGD BFA majors.
No project content matches this search.
Here you’ll find definitions for common terms used throughout the Learn section. The glossary is organized by course, project, and general categories so you can quickly find unfamiliar terminology.
These definitions are specific to my classes and reflect how I use each term in an academic setting to help guide you through the course material and production process. The industry, other faculty, and individual artists may define or use some of these terms differently.
Because terminology can change depending on the context, make sure you are viewing the correct category for the term you are referencing.
No content matches this search.
This supplemental learning thread provides an overview of the tools and workflows used to organize, share, and manage digital projects. It introduces the foundational concepts behind collaborative production while building the skills needed to work effectively across modern game and film pipelines.
No content matches this search.
No courses match your search.
An introduction to why anatomy matters, how artists study the human body, and the shared terminology used to describe its forms, positions, and movement.
A study of the skull, facial muscles, features, and proportions that shape the structure, likeness, and expression of the human head.
An overview of the bones, joints, muscles, tendons, and landmarks that establish the body’s structure and make movement possible.
An introduction to how the needs of a production shape an environment’s scope, workflow, tools, and final presentation.
This course has been taught previously, but its lectures and supporting resources have not yet been added to the site. The page will be expanded the next time the course is offered as I continue building out the Learn section around my current teaching schedule.
Google Drive for Desktop is an easy way to collaborate on projects without setting up a full source control system like Perforce or Git. While it doesn't provide version control or file locking, it works well for individual projects and small teams that simply need access to the latest files.
Drive for Desktop keeps your files synchronized between your computer and Google Drive.
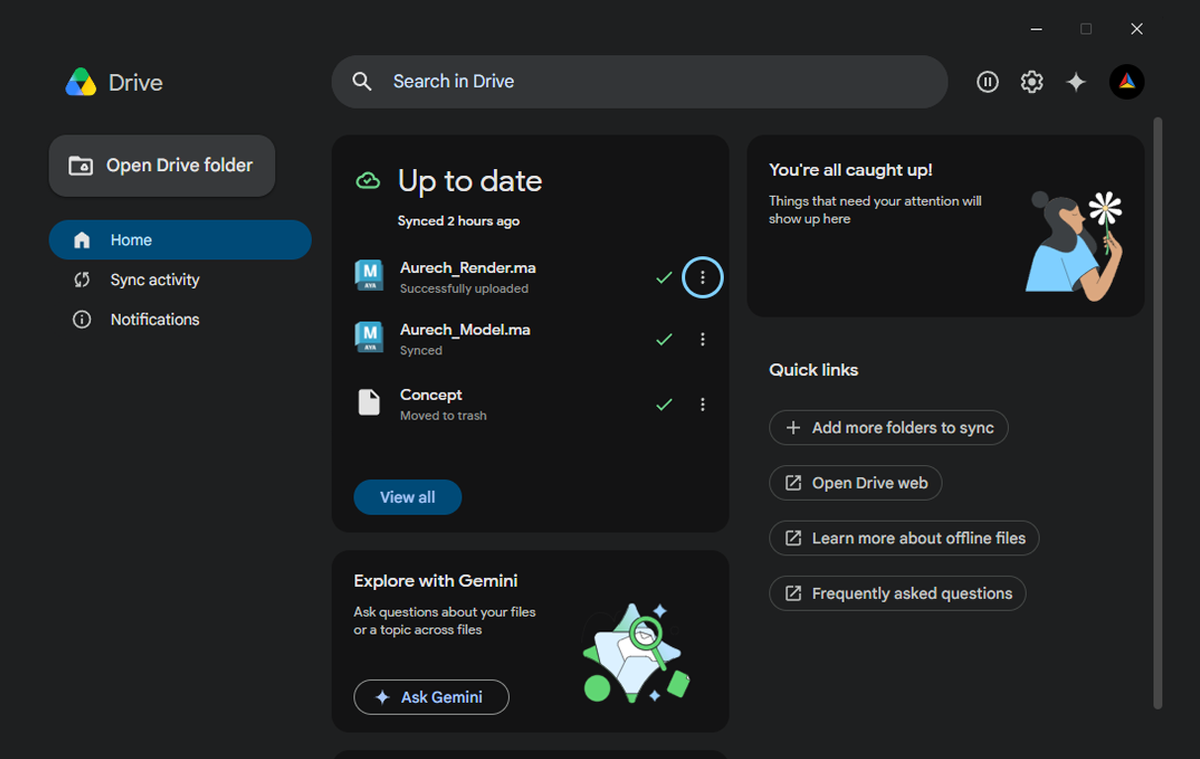
When you edit, move, rename, or delete a file, those changes are automatically synchronized to the cloud and shared with anyone who has access to the project folder. This helps ensure everyone is working from the latest version of the project.
Note: Avoid having multiple people edit the same file (such as a Maya scene or ZBrush project) at the same time. Google Drive cannot merge changes like Perforce or Git, so there is a higher risk of stomping over each others work.
Download Drive for Desktop: Here!
Once installed, Google Drive runs in the background and creates a Google Drive location in File Explorer.
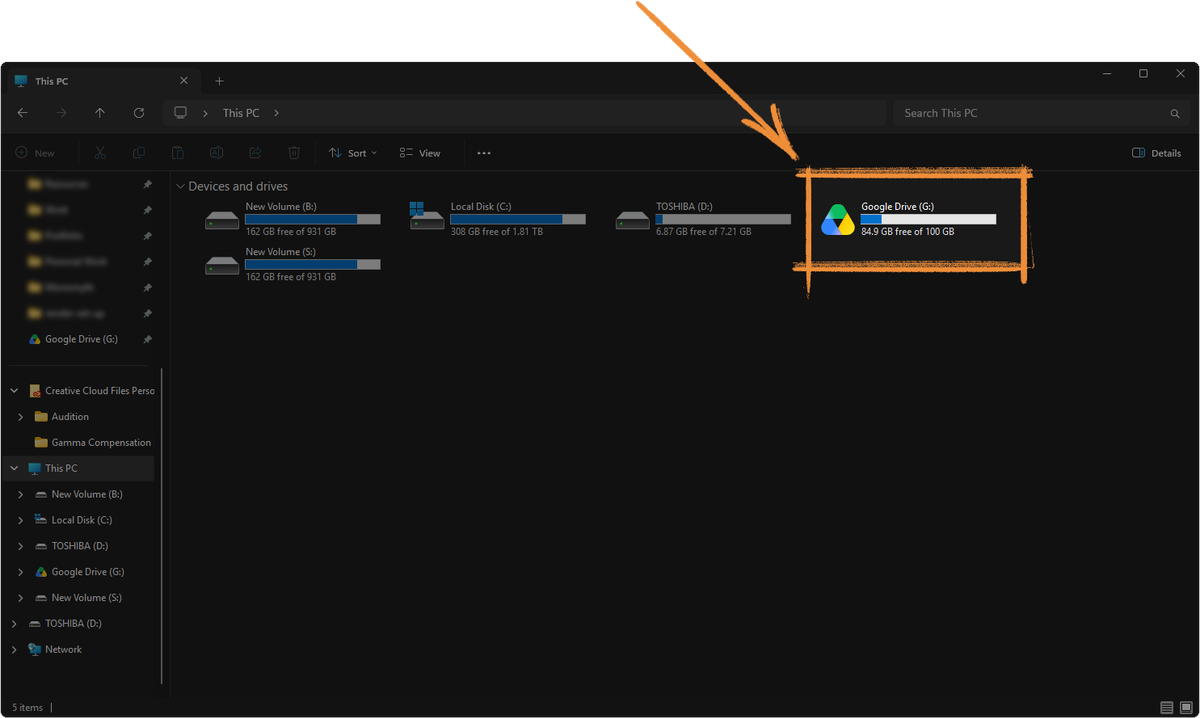
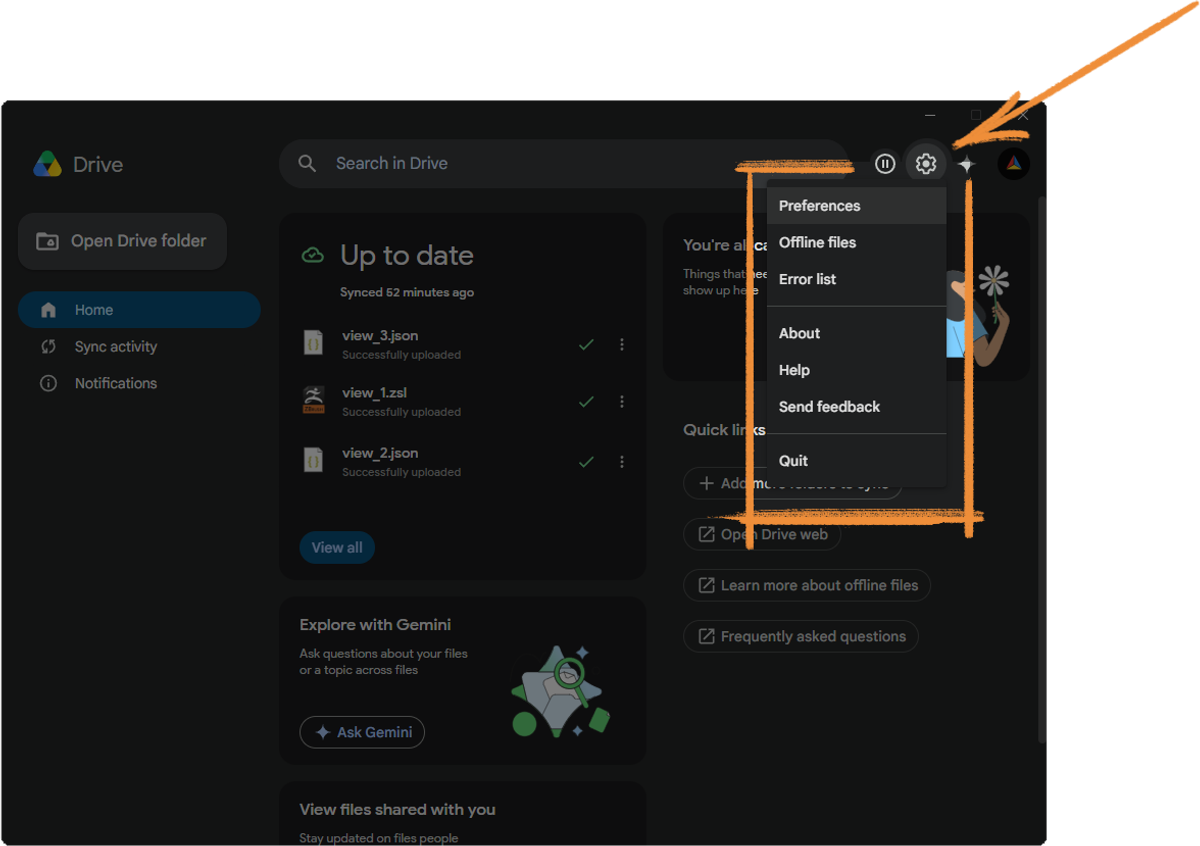
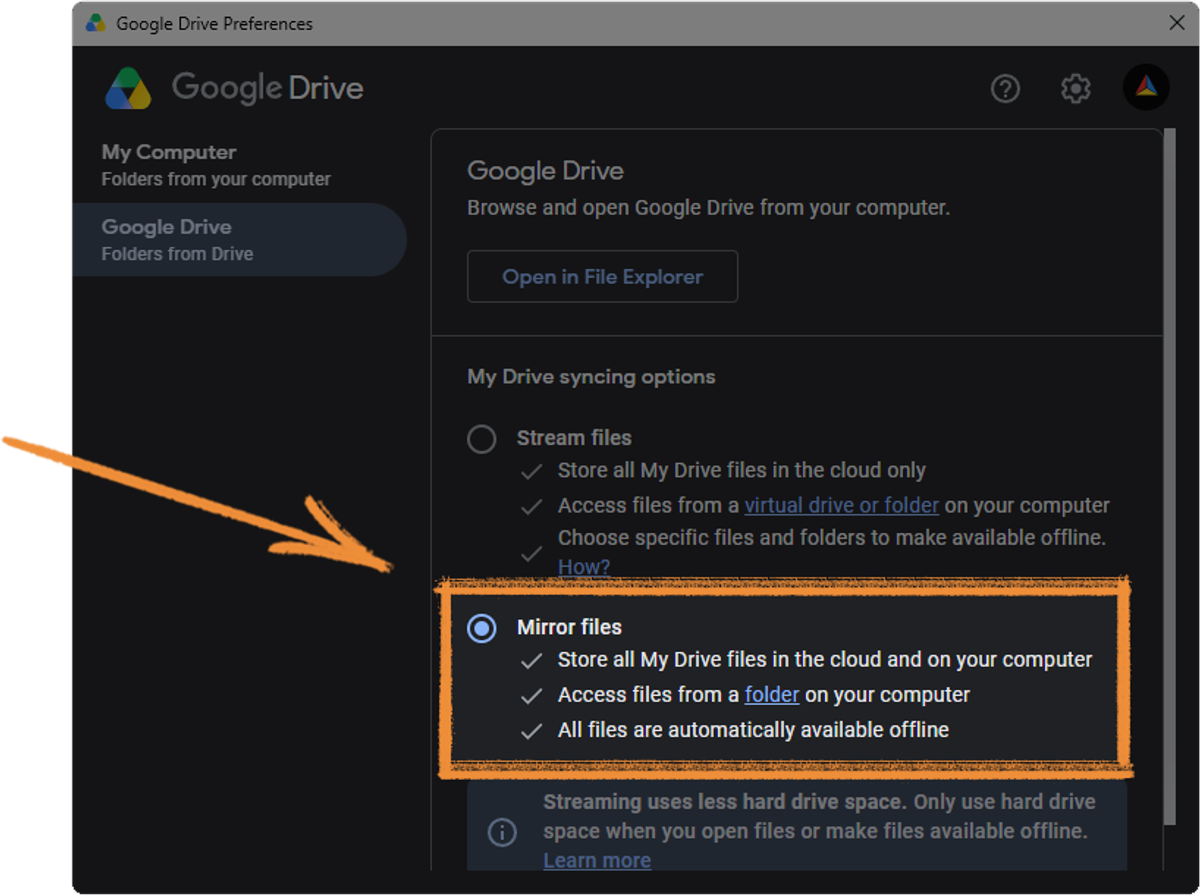
Drive for Desktop supports two sync modes:
Files stay in the cloud and are downloaded when you open them.
Keeps a complete copy of your Google Drive on your computer.
Centralized version control built for large binary game assets, changelists, and stream-based workflows.
Distributed version control for code and lightweight assets — branching, commits, and collaboration fundamentals.
Organic Modeling is our introduction to digital sculpture in ZBrush.
Throughout the semester, we’ll learn the software alongside the fundamentals of sculpture, gradually moving from short exercises and studies into larger finished work.
The goal is to become comfortable enough with the tools that we can spend more of our time thinking about the sculpture itself.
The course is built around three main phases:
Early in the semester, a lot of the decisions around how things are made will be very specific so we can focus on the tools and ideas being introduced.
As the semester progresses, I’ll gradually pull back and you’ll become more autonomous.
By the time we reach the Alien Bust, you should be able to take a creative brief, work within its constraints, and make more of those decisions on your own.
The first part of the semester is about getting comfortable sculpting.
We’ll work through a series of simple subjects that let us focus on one or two ideas at a time.
A snowman, for example, gives us a reason to learn how to work with multiple SubTools and manipulate them with the Gizmo without also worrying about anatomy, complex reference, or detail.
The subjects will become more complex as you build a stronger understanding of both the software and the principles of digital sculpting.
Food Time is our first complete digitally sculpted illustrative piece.
This is where we begin combining more of what we’ve learned into one sculpt and start thinking about how different forms and materials work together.
It gives us a chance to explore more complexity without jumping straight into character work.
We’ll spend the semester working toward the skills needed to design, sculpt, and complete an Alien Bust.
By this point, the basic sculpting workflow should feel more familiar, which gives us more room to focus on character design, anatomy, and hard-surface elements within ZBrush.
Alongside the larger work, you’ll keep a Digital Sketchbook throughout the semester.
This is where you’ll get more reps in through quick studies, experiments, reference studies, and smaller sculpts.
We’ll stop around the middle of the semester for a sketchbook review and revisit it again at the end.
We’ll also make time for occasional quick sculpting.
Some sessions may only take an hour. Others may take up most of a studio day.
There are a lot of benefits to quick sculpting, but ultimately it helps you become less dependent on step-by-step demonstrations, get better at sculpting what you see, and stop treating every mark like it has to be precious.
This is about more than just learning what buttons to press in Maxon ZBrush.
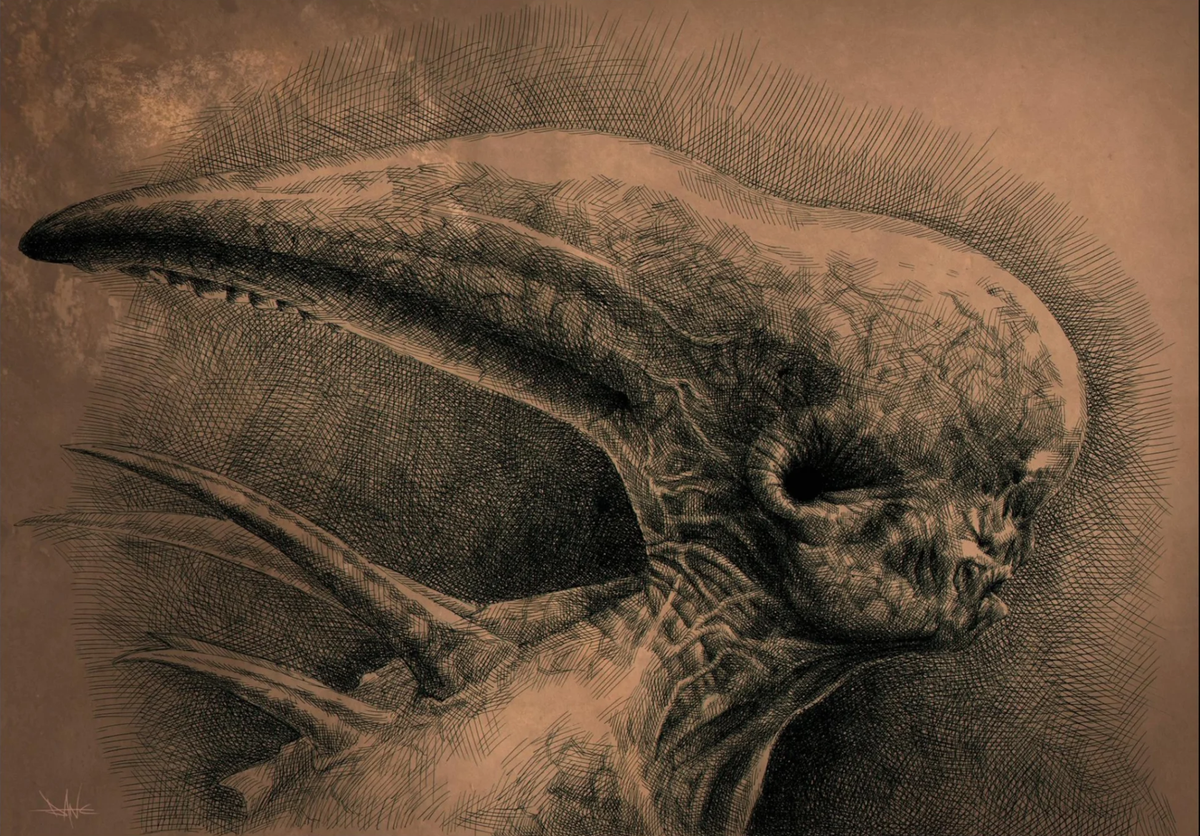
For this project, you’ll design and sculpt an original alien bust while developing a stronger understanding of form, anatomy, design, and the core tools we’ll use throughout the class.
We’ll also use the project to begin building a process for taking an idea all the way to a finished 3D digital sculpture.
By the end of the project, your alien bust should demonstrate:
You’ll leave the project with a process you can continue to reuse and refine as the work in this class becomes more complex.
A bust is a sculpture that focuses on a character’s head, neck, shoulders, and upper chest.
Feel free to explore unusual anatomy, proportions, appendages, horns, fins, eyes, jaws, and other features. Just make sure the alien itself remains the focus of the design.
Xenobiology is the study of life that does not originate from Earth.
Unfortunately for us, we don’t have any aliens to study. So we’re starting with life on Earth!
Each of you will receive three ingredients:
Now let’s find out what you’re working with!
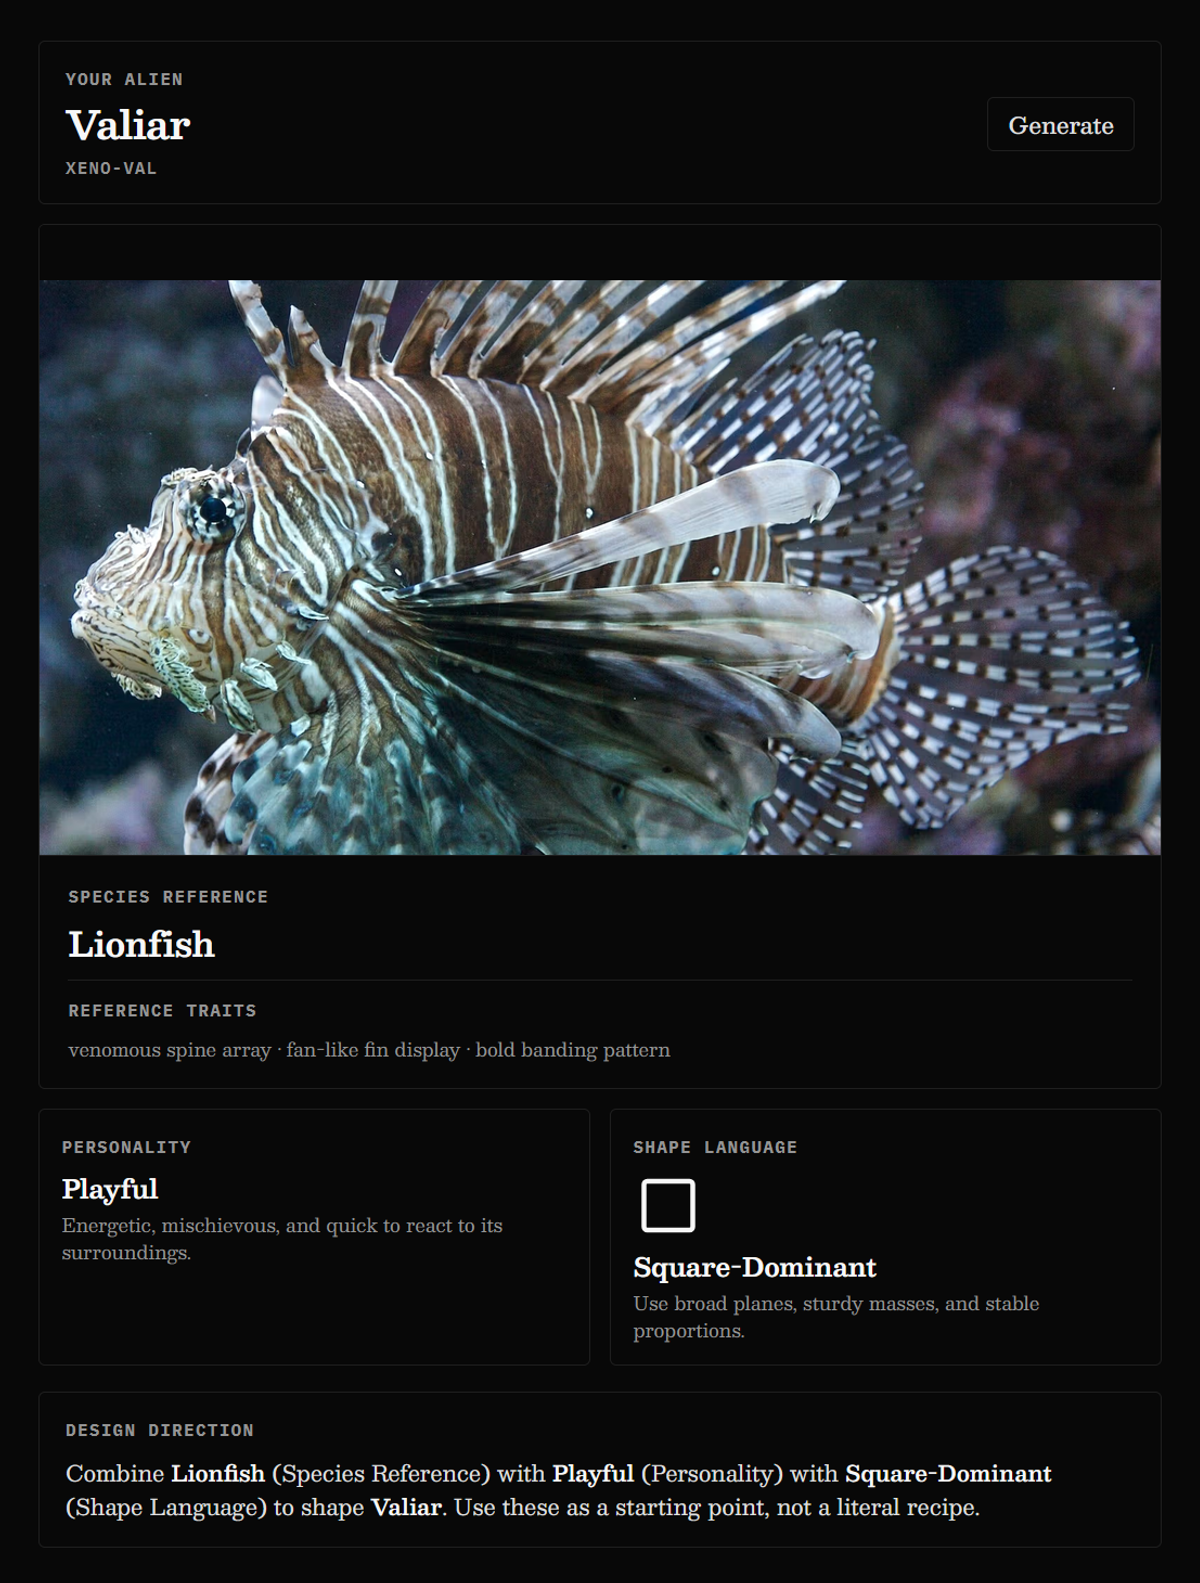
Use the Xenobiology Generator to generate your design brief.
Screenshot and save your result. It will become the starting point for your Alien Bust and will be included on your reference board.
▒░▓ · ░▓▒ · ▓▒░
▒░▓▒ ░▓▒░ ▓▒░▒ ▒▓░░▒ ░▓▒▓ ▒░▓░▒ ▓▒░ ▒░▓▒░ ▓▒░▒ ▒▓░ ░▓▒▓▒░▓ ▒░▓▒.
The generator gives you creative constraints.
Your job is to figure out how those ideas can belong to the same character.
Two artists in this class could receive similar briefs and create completely different aliens. That’s okay!
The brief gives you creative constraints, but it’s up to each of you to provide a creative interpretation.
Species: Lionfish
Personality: Playful
Shape Language: Square-Dominant
There is already some tension there.
Perfect!
Those contradictions give me something to creatively solve.
We will work on this in stages, each one building on the last. Here's the workflow and some brief notes regarding what I'll be looking for as y'all make progress.
Before we start sculpting, we first need to learn everything we need to about our design brief.
That starts with reference.
“If I have seen further it is by standing on the shoulders of giants.” - Isaac Netwon

I’m a huge fan of this quote because Newton is acknowledging that his discoveries were possible because he could build on the knowledge and accomplishments of those who came before him.
The same is true for us as artists.
We do not want to create in a vacuum. We want to take advantage of centuries of observation, anatomy, craftsmanship, engineering, design, storytelling, and visual culture.
As artists, we are not only standing on the shoulders of giants.
We are creating on them.
Reference gives us access to that larger body of knowledge and helps us make stronger, more informed decisions.
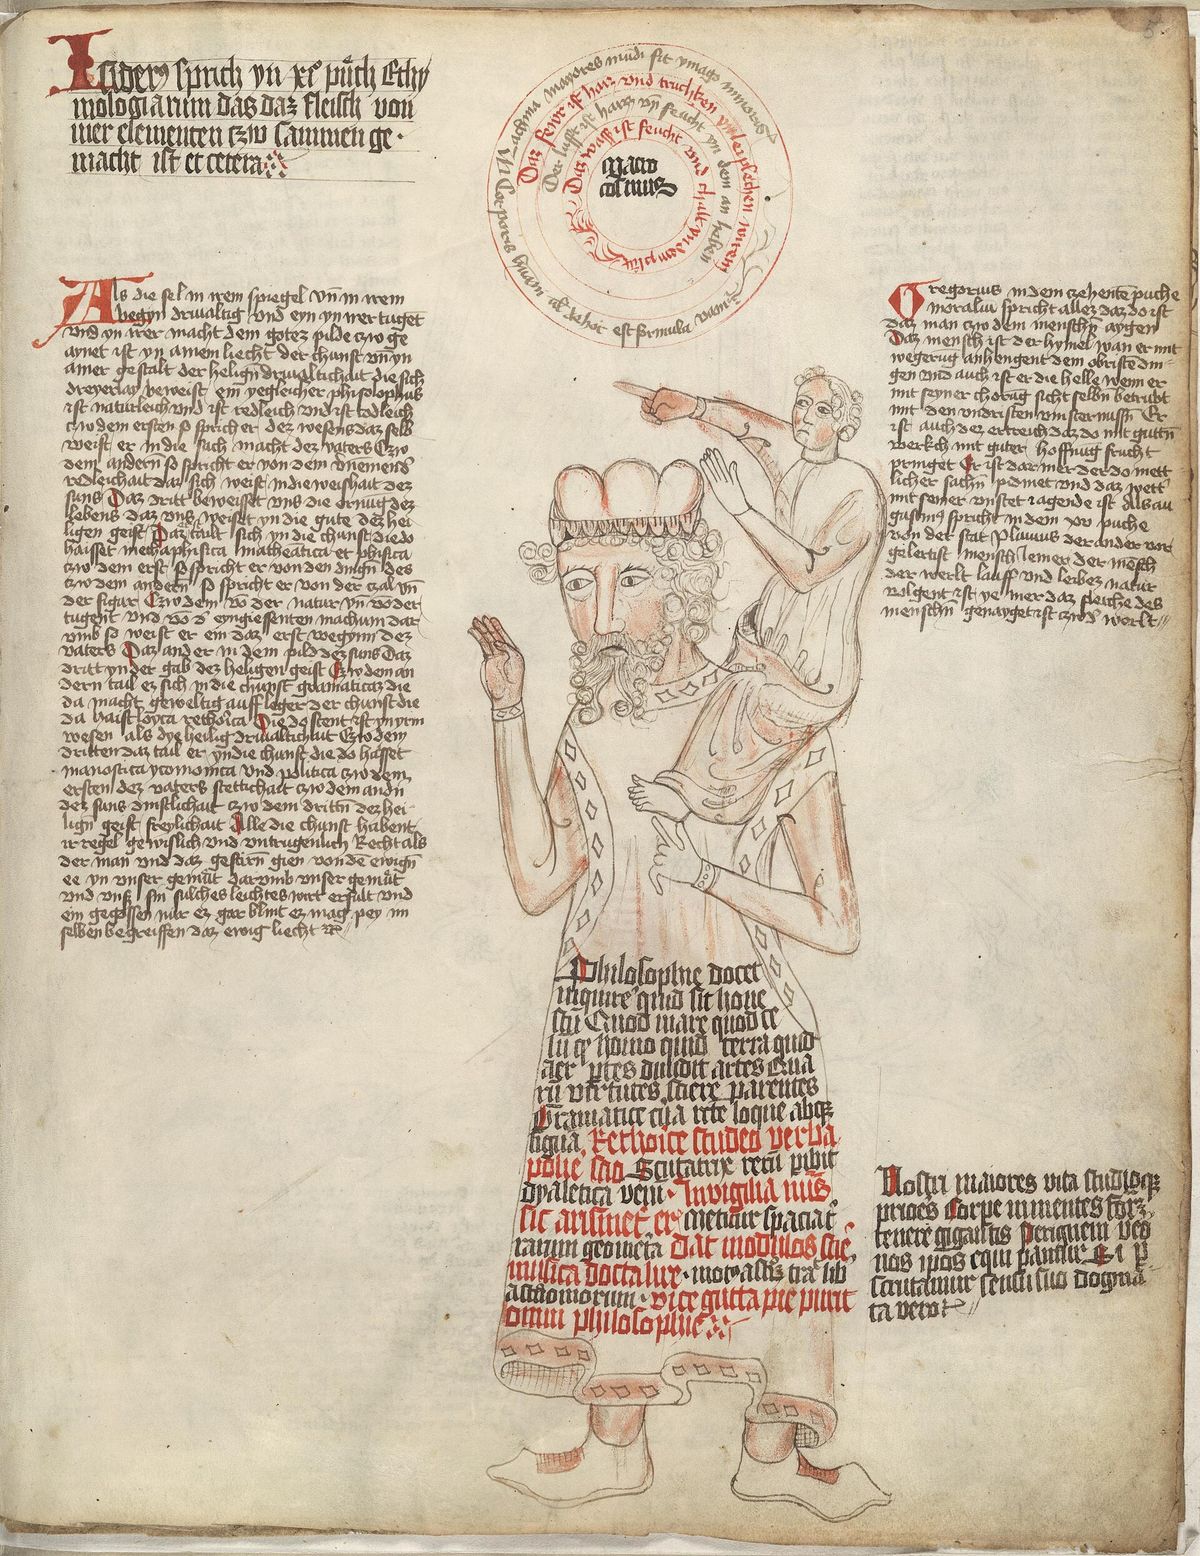
Even our most fictional ideas are built from things that already exist.
Reference allows us to study those influences and use them intentionally.
Using reference does not make you less creative.
It gives you information about things like:
Unless you are doing a master study, the goal is not to find one image and copy it.
We want to gather enough information to understand the subject, then use that understanding to make decisions of our own.
Reference gives you information. You still have to decide what to do with it.
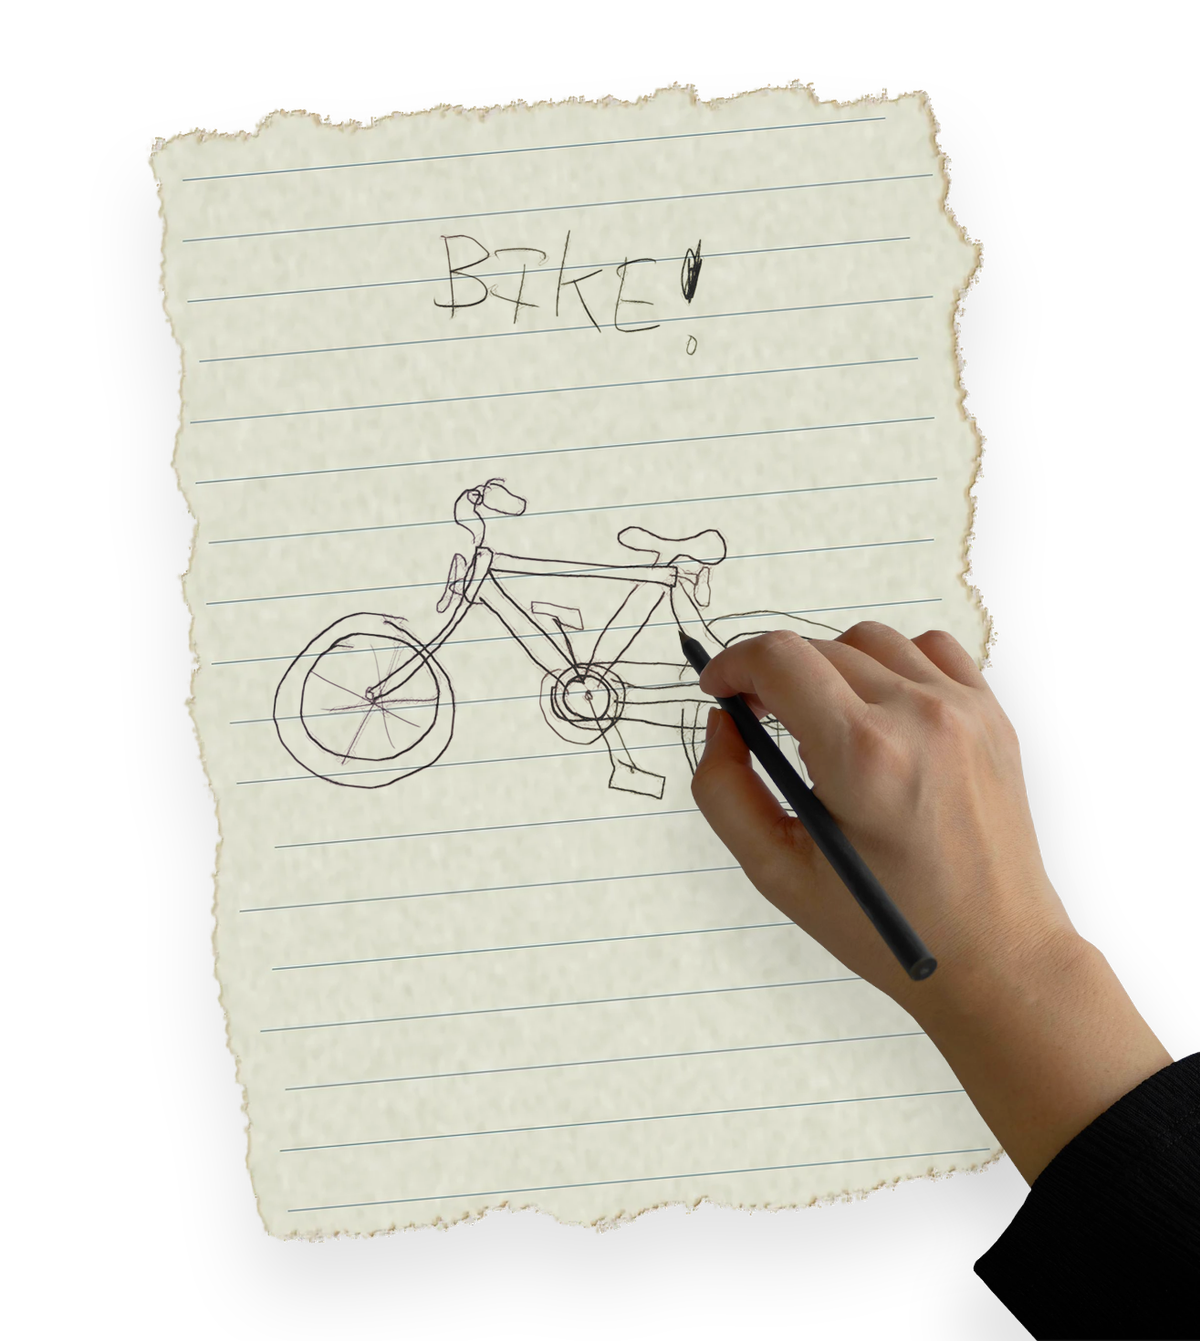
Let’s do a quick exercise.
Most people start with two circles.
Then maybe a frame, a seat, handlebars, pedals, and a chain.
The drawing probably reads as a bike.
But does it actually explain how a bike is built?
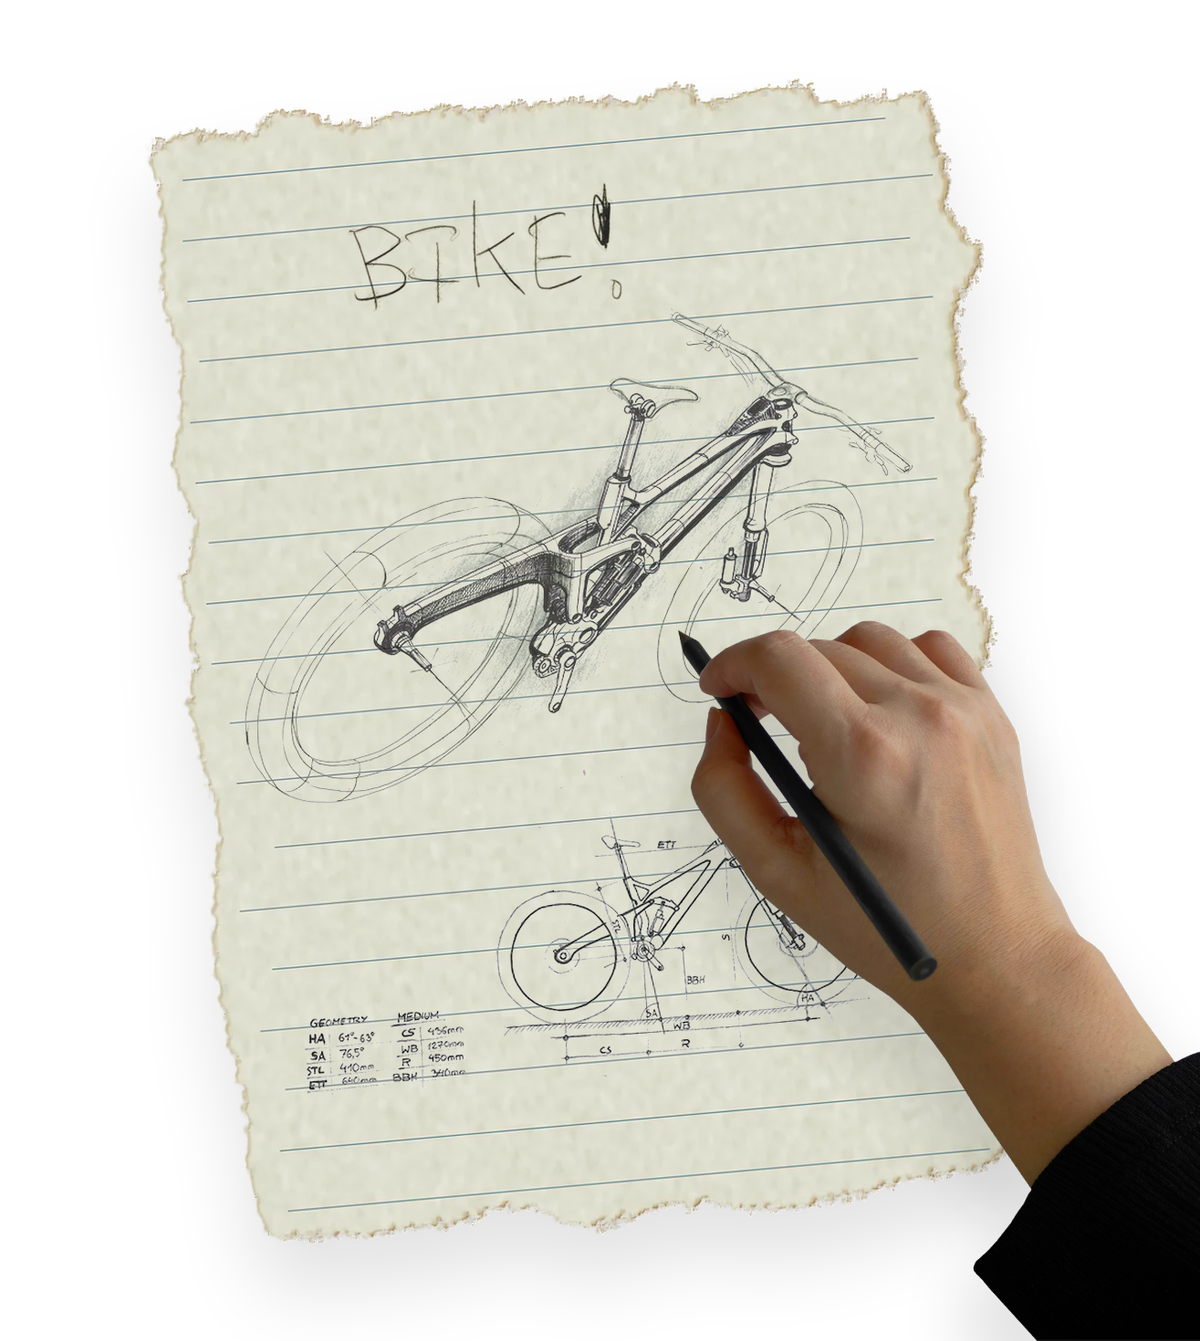
Now compare your drawing to an actual bicycle.
Ask yourself:
Most of us remember the idea of a bike much better than we remember its construction.
Our memory simplifies things into just enough information for recognition.
For a bike, that might be:
That is enough to communicate the idea, but not enough to recreate one accurately.
The same thing happens when we sculpt a face, hand, creature, piece of clothing, or suit of armor.
We may recognize the subject without actually understanding how it is built.
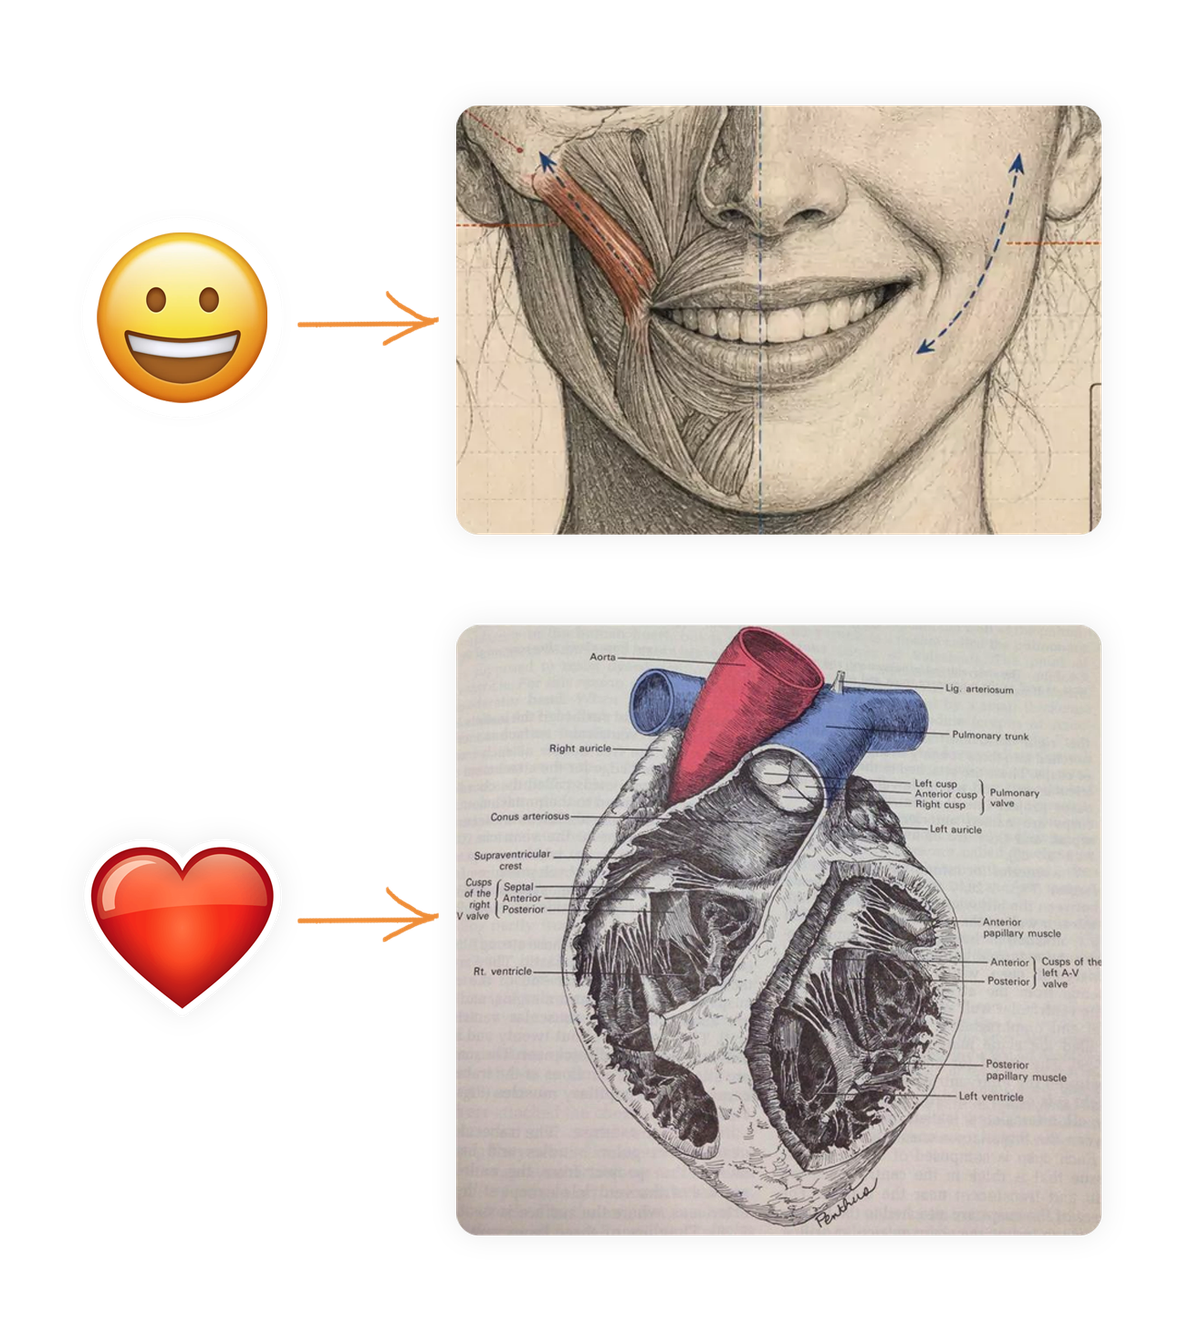
A recognizable object and a believable object are not always the same thing.
To recreate something convincingly, we need to understand:
Memory gives us the symbol and reference helps us understand the structure.
For this class, we are going to organize our reference into three broad categories:
What are we creating and how is it built?
Subject reference helps us understand the thing itself.
Look for information about:
For the Alien Bust, this begins with your assigned species.
If I am creating an alien inspired by a lionfish, I first need to understand what makes a lionfish a lionfish.
What should it look like, feel like, and communicate?
Design reference helps us explore how we want to interpret the subject.
This can include:
Design reference does not have to match your subject.
A lionfish inspired alien might use one character as reference for proportions, another for personality, and a completely different creature for facial structure.
The important question is:
What is it made of and how does that material behave?
Surface reference helps us understand the smaller visual information sitting on top of our larger forms.
Look for:
A photograph of the whole animal helps us understand its overall design.
A close-up helps us understand what it is actually made of.
That is okay!
A single image might teach you about anatomy, design, and surface at the same time.
The categories are simply a way to make sure we are gathering reference for different kinds of questions instead of collecting images at random.
Your reference board is not something you make after the design is finished.
It is part of how you find the design.
For your Alien Bust, your board should help you understand:
The goal is not to know exactly what your alien looks like yet.
The goal is to gather enough useful information that you can begin making informed decisions.
Next, we’ll put that into practice by building the reference board for Valiar.
Learn navigation, DynaMesh, and the essential sculpting brushes (Move, Clay Buildup, Dam Standard). These are the tools you will use for the rest of the project.
In this class, the block-in is the first major deliverable for each project.
It gives us a clear understanding of what you are creating and establishes a strong foundation before you begin refining smaller forms or adding detail.
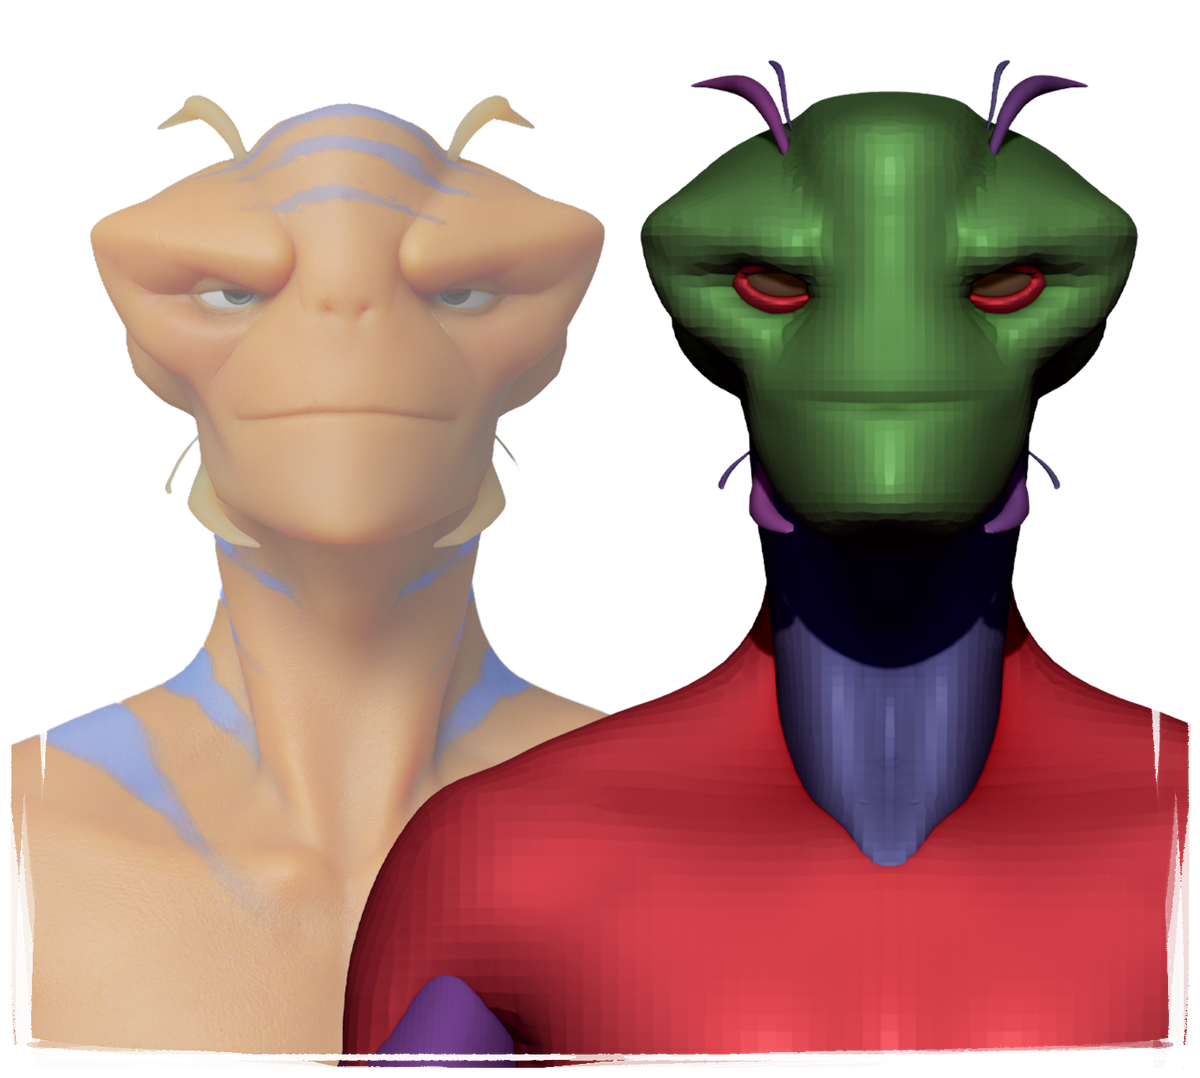
Our block-ins are built around three pillars that should remain top of mind as we develop our alien bust: Form, Design, and Coverage.
We will define each of the pillars as follows:
The first priority of the block-in is establishing the sculpture’s primary forms.
Primary forms are the largest volumes that make up the character, such as the head, neck, shoulders, and torso. These forms establish the physical structure of the sculpture and create the foundation for everything that follows.
At this stage, you should be asking:
Smaller forms and surface details cannot correct weak underlying structure. Adding detail too early may feel productive, but it often distracts from larger sculptural problems.
A strong block-in should communicate clear volume and structure without relying on pores, wrinkles, textures, or other surface details.
The second pillar of the block-in is design.
Once the primary forms are established, the character’s proportions, silhouette, and shape play should work together to communicate a clear visual direction. These choices determine how the character looks, feels, and reads before any smaller details are added.
At this stage, you should be asking:
These are just a few elements of design that you’ll need to keep top of mind as you continue producing more 3D art.
The third pillar of the block-in is representing the complete project.
Every major element shown in the design should have a 3D representation. For a character, this may include the head, body, clothing, armor, hair, accessories, props, and any other element that affects the final design.
These elements do not need to be polished, but they should be present and developed enough to communicate their scale, placement, and relationship to the rest of the character.
At this stage, you should be asking:
A block-in with strong forms and design can still be incomplete if major elements are missing. Including the full design allows us to evaluate the character as a whole and identify problems before moving into refinement.
Coverage also helps establish the scope of the project. Once every major element is represented, you can better understand how many pieces must be refined, how they should be organized, and where your time will need to be spent.
An introduction to anatomical terminology, directional language, planes of the body, movement, and the vocabulary we will use to talk anatomy throughout the course.
What anatomy is, why artists study it, and how it applies across 3D disciplines.
“remember that you must die”
The phrase has appeared throughout art and history as a reminder of mortality and the inevitability of death. Skulls became one of the most recognizable symbols of that idea, appearing in paintings, sculpture, religious works, and anatomical studies across centuries.
For us, the skull is more than a symbol. It is the structure underneath the face and one of the most important foundations for understanding the human head.
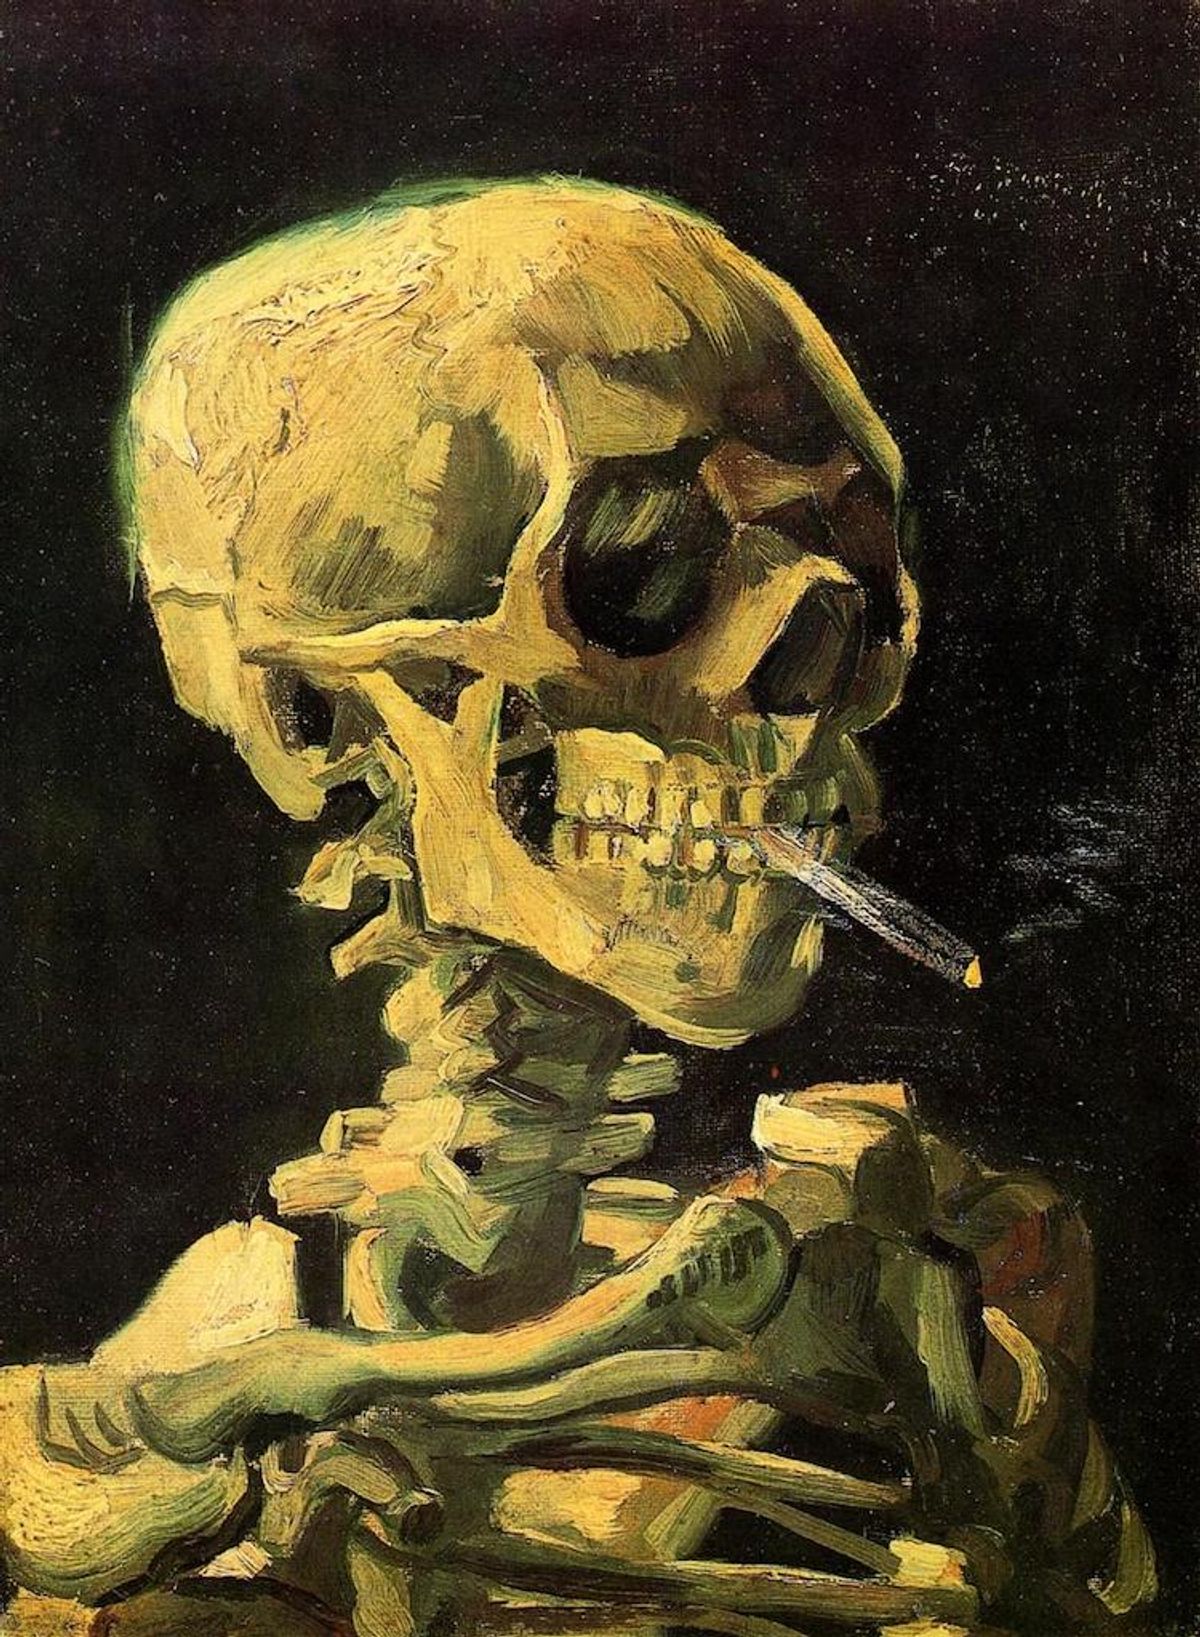
Our study of the skull goes back thousands of years.
The Edwin Smith Papyrus is one of the oldest known surgical texts, surviving as a copy from around 1600 BCE. It documents 48 cases of physical trauma and works systematically from injuries of the head downward through the body.
What makes it especially interesting is how familiar the process feels. Each case moves through examination, diagnosis, and treatment.
Long before modern anatomy, people were already observing the body, documenting what they saw, and trying to understand the relationship between its structure and function.

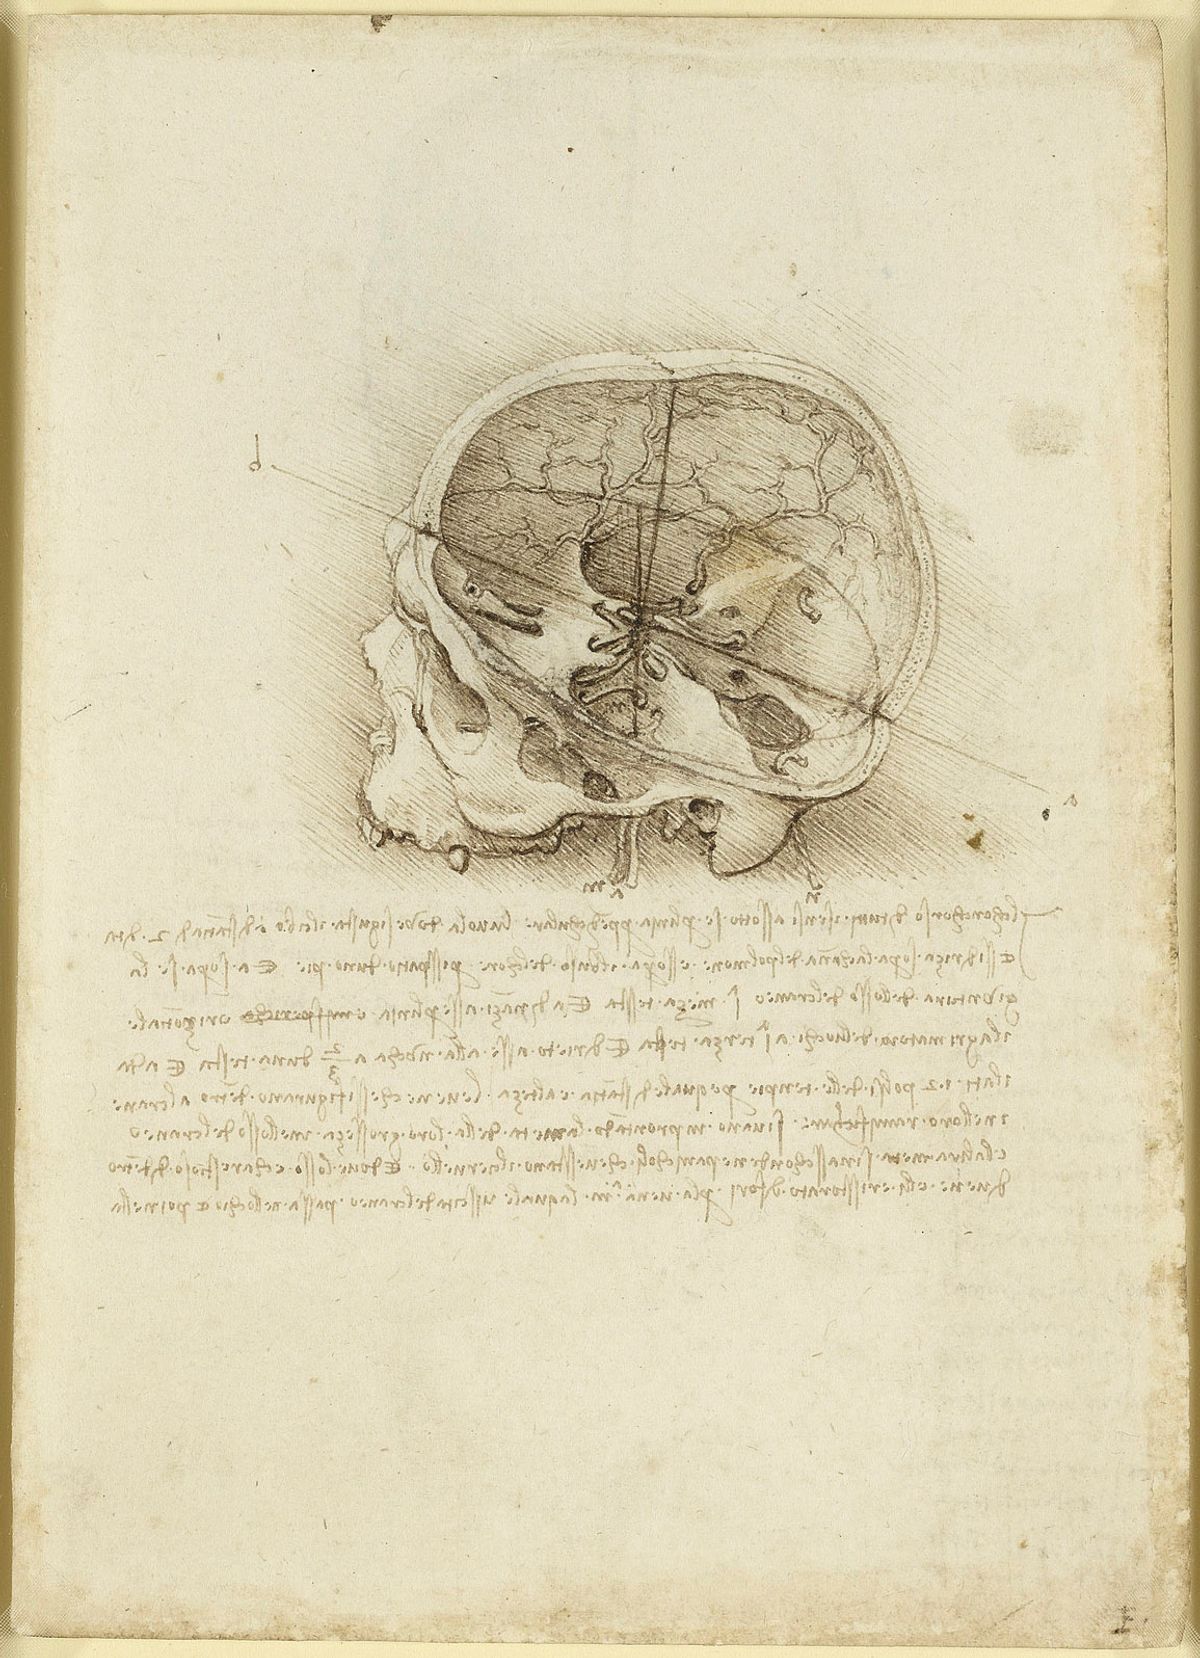
By the late 1400s, Leonardo da Vinci was taking that observation much further.
Leonardo dissected and sectioned human skulls to better understand their internal structure. Rather than treating the skull only as an exterior object, he cut through it and drew what was inside, using sections and measurable planes to investigate how its different structures related to one another.
He was especially interested in the brain, the pathways of the sensory nerves, and where human perception might originate. Some of his ideas were ultimately incorrect, but the way he approached the problem is still incredibly relevant to us as artists.
He observed, measured, dissected, and drew what was actually there.
Before we start naming every individual bone, it helps to simplify the skull into two major masses: the neurocranium and the splanchnocranium..
We can also refer to the neurocranium, as the brainbox. It makes up the large upper and back portion of the skull and encases the brain.
Also known as the face of the human head. It includes the structures that form the eye sockets, nose, cheekbones, and jaws.
It is important to understand how the brainbox and face fit together before worrying about individual bones. We can simplify both into basic primitives to make that relationship easier to see.
The face is not a flat mask sitting on the front of a ball. It is its own volume that projects forward from the neurocranium and continues underneath it.
As you rotate the model, pay attention to the size of each mass, where they overlap, and how one transitions into the other. Look at what happens to the silhouette from the front, side, three-quarter, top, and bottom views.
This simplified relationship gives us something much easier to understand and remember before we begin breaking the skull into its individual bones.
How the facial muscles influence form, movement, and expression.
An introduction to how the needs of a production shape an environment’s scope, workflow, tools, and final presentation.
Rotate your device to landscape to view this presentation.